Did you know that an average sofa’s estimated average carbon footprint is equivalent to 10.1 gallons of consumed gasoline? It’s true!
Back in 2011, the Furniture Industry Research Association, or FIRA for short, took it upon themselves to find out furniture’s carbon footprint, and the results were quite shocking.
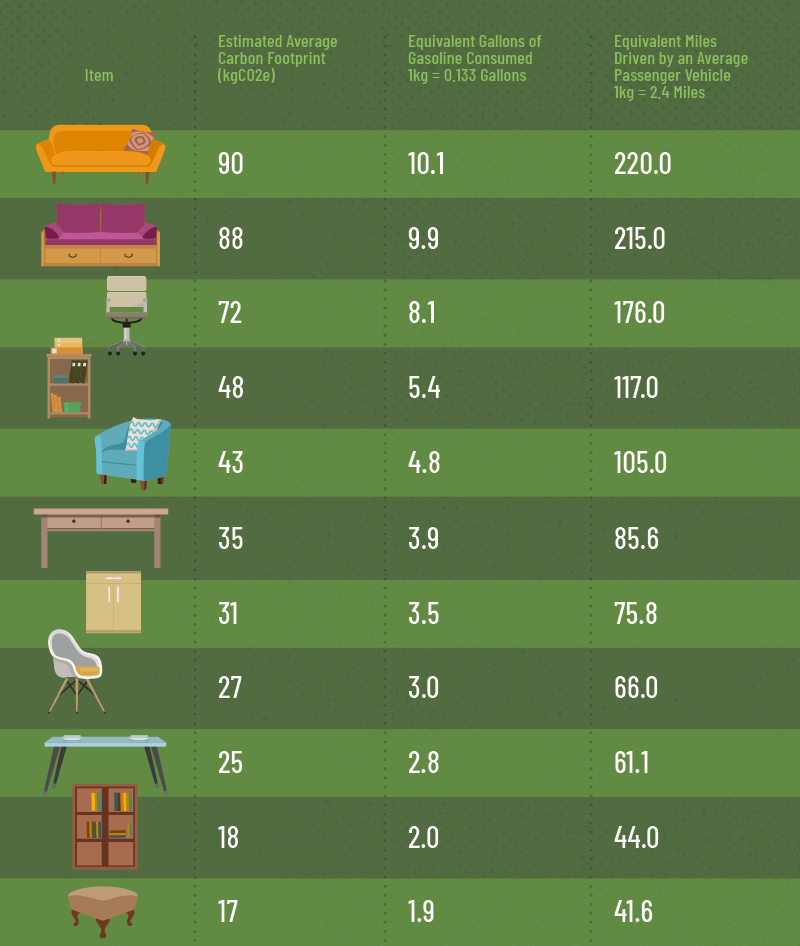
Sample Of Findings*
Data calculated from production through distribution*
The findings highlighted that the production of many of your common household furnishings resulted in quite sizeable amounts of CO2e. Everything from dining tables to footstools, you name it, there’s likely to be a carbon footprint, with the average piece of furniture consuming approximately 47kg of CO2e, which is the same as 5.3 gallons of consumed gasoline.
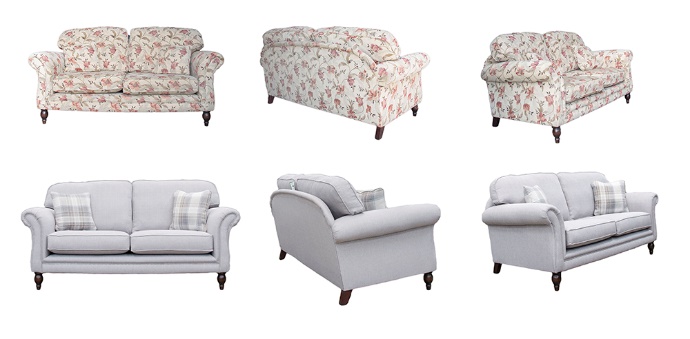
Not only did the research show the overall carbon footprint but also what materials within the furniture contributed to it the most. Here’s a breakdown of an average sofa as an example.
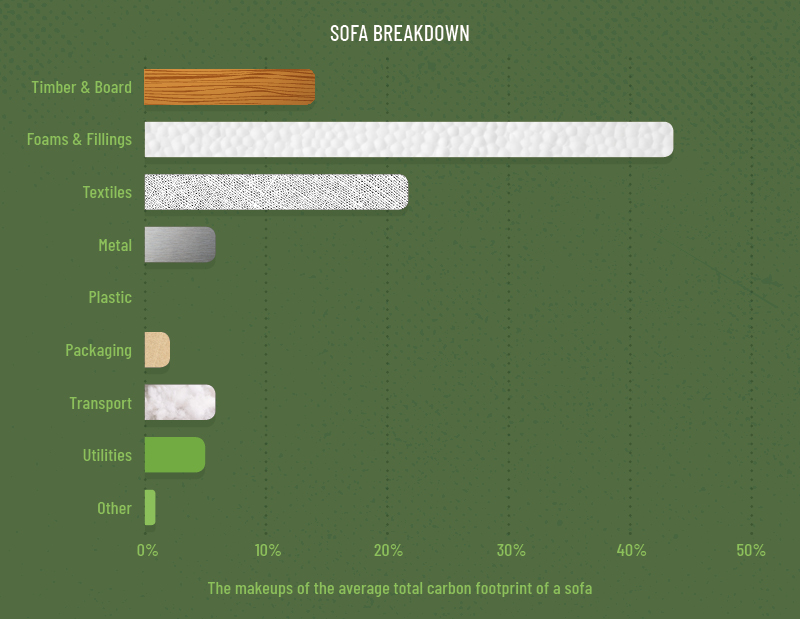
While this research was conducted a few years ago, it is still relevant today, as emissions from furniture manufacturing haven’t dropped by any great margin since.

Source = Ricardo-AEA; Office for National Statistics
This research just amplifies the importance of upcycling when it comes to helping preserve our planet. As a result, we’ve put together a list of our top tips on how to revive an old piece of furniture into something cool, fresh and looking brand new.
6 Simple Ideas for Upcycling Old Furniture
Here are eight super quick and easy tips for bringing life back into an old piece of furniture.
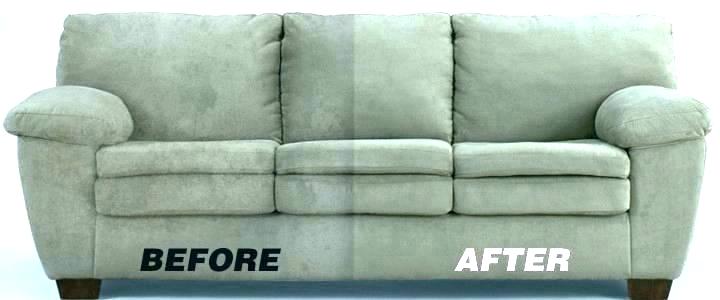
Start With a Deep Clean
It’s surprising what a deep clean can do to your sofa or armchair, especially if it’s made from microfibre. And it’s not that big of a job either. Some rubbing alcohol, a scrub brush and a white or tan sponge are all you need to get your furniture back to its freshest.
What You’ll Need:
- Spray Bottle
- Rubbing Alcohol
- Scrub Brush
- Sponge
How to Deep Clean Furniture
- Fill a spray bottle with rubbing alcohol.
- Spray all microfibre areas.
- With the sponge, scrub the microfibre thoroughly.
- Allow to dry.
- Once dry, get your scrub brush and, using circular motions, scrub the microfibre.
- If necessary, repeat for tough areas.

It’s Tufting Time
Another fix for cushions that have lost a bit of their plumpness, is tufting. Not only does this divide up the stuffing and give it a cool look, but it’ll also help the stuffing remain in place.
What You’ll Need:
- Heavy Thread
- Extra Long Upholstery Needle
- Pins
- Marker
- Scissors
- Tape Measure
How to Add Tufting To a Cushion
- Mark X’s on your cushion/s for tufting placement using measuring tape and pins.
- Repeat identically on the other side of your cushion/s.
- Cut a piece of thread doubled + 10” the width of the cushion. So, if a cushion is 3” thick, your thread should be at least 16” long.
- Pull the thread through needle then insert into one of the top points of one of your drawn X’s from the back of the cushion all the way through so it comes out at the same front marked point. Pull through leaving 5” out the back of the cushion.
- Insert the needle back into the cushion at the opposite end of the drawn X’s line and pull through to the back.
- Repeat this but starting at the other top point of the drawn X. Once complete you should have a threaded X on the front of your cushion.
- Slip the thread out of the needle and pull the ends taut, creating the depression of the tuft, then tie the ends together.
- Remove any long remaining thread and repeat for the other tufting marks.
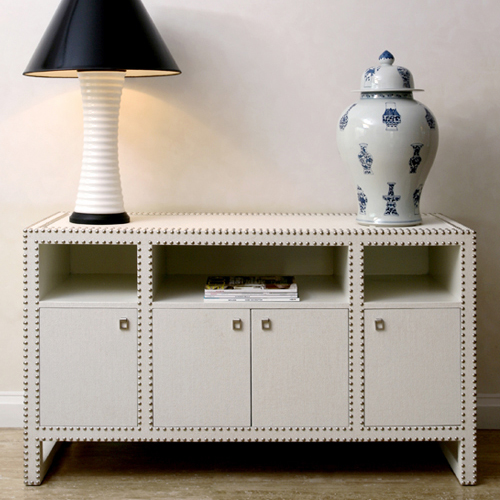
Trim the Edges With Some Nailheads
Adding nailheads to your furniture is a fantastic way to subtly liven up a plain item. Simply place them around the trim of your sofa, the headboard of your bed or wherever you feel it’s suitable and watch your furniture turn from boring to brilliant.
Check out this video on YouTube
What You’ll Need:
- Ruler or Spacer
- Nailheads
- Rubber Mallet or Hammer
- Fabric Marker
How to Add Nailheads to Furniture
- Begin by drawing a line where the nailheads will be placed, the same distance from the edge all the way around your piece of furniture, or wherever you desire your nailheads to be placed.
- We recommend placing the first nailhead in the corner and hammer it in on the line you’ve created using a hammer or preferably a rubber mallet, as these are less likely to scratch your nailheads.
- Next, measure your preferred spacing from the first nailhead to your second using the ruler or spacer and mark the desired location using the fabric marker, then hammer in your second nailhead.
- Repeat this process until all your nailheads are in place.

Did You Say, Paint Your Sofa?!
That’s right! If your leather sofa has faded, you can paint it back to its former self or pick a brand-new colour if you’d prefer. So, how do you do it?
What You’ll Need:
- Leather Bleach
- Soft-Bristle Brush
- Flat Paint Brush
- Rubbing Alcohol
- Acrylic Paint for Leather
- Warm Water
- Cold Water
- Hand Towel
- Sandpaper
- Safety Goggles
- Facial Mask
- Gloves
How to Paint a Leather Sofa
- Clean the leather. Simply vacuum and wipe away as much grit, dirt and dust as possible in order to keep things smooth when painting.
- Mix the leather bleach with one pint of cold water.
- Use the soft-bristled brush to scrub the leather thoroughly with the mixture, then dry using a hand towel.
- Apply rubbing alcohol to the sofa with a washcloth and thoroughly scrub. This will remove the protective coatings, allowing the new paint to stick.
- Sand the sofa gently to make sure all the protection is removed.
- Next, you’ll need to prime the material using a solution made up of one-part acrylic paint to one-part water which will act as a base coat so that the later, undiluted coat of paint has something to adhere to. Use a flat paint brush and apply using long, even strokes.
- Once the second layer of primer solution is almost dry, apply a thin layer of undiluted acrylic paint across the entire surface, then keep layering as necessary and allow to dry.

Get Out the Sander
Wooden furniture can become scratched, stained, dented and dull over time. Get these items back to their former selves by sanding and varnishing, giving them a new lease of life. Alternatively, once sanded, why not give your wooden furniture a new lick of paint?
What You’ll Need
- Sandpaper / Hand Sander / Electric Sander
- Wood Conditioner
- Disposable Gloves
- Facial Mask
- Protective Goggles
- 2-3 Tack Cloths
- Floor/Ground Protection
- Sponges
- Paint Brushes
- Woodstain
- Lint-Free Cloths
How to Refurbish a Wooden Table
- First, put on your protective gear including goggles, gloves and face mask. Also, set down any protective floor/furniture covering needed before starting.
- Next, begin sanding the table using coarse grit sandpaper, progressing to finer sandpaper. Make sure to sand with the grain of the wood and wipe away particles between switching sandpaper. If you’re using an electric sander, built-in vacuums will help massively with this.
- Once all the dust from sanding has been removed, apply wood conditioner with a sponge and allow to dry.
- Then, apply the woodstain in an even layer, letting each section dry for a few minutes. Use a lint-free cloth to wipe away any excess.
- Sand and reapply stain until you have your desired colour.
- Do a final sand of the wood to smooth.
Reupholster To Feel Like New
Reupholstering is quite a big job but can be very rewarding. There are many companies that will do this for you but if you’d prefer to do it yourself you can save yourself a pretty penny. A word of caution though, this is not an afternoon job so make sure you set aside enough time to complete the project.
What You’ll Need:
- Tape Measure
- Fabric
- Scissors
- Synthetic Foam Padding
- Pencil
- Staple Gun
- Needle and Thread/Sewing Machine
- Zipper
- Screws
- Nails
- Wood Glue
How to Reupholster a Sofa
- Measure your sofa and cushions before buying fabric. Consider buying extra (roughly 10% more than you think you’ll need) in case mistakes happen.
- Flip your sofa upside down and remove all fabric from the bottom. Flip back and remove the outside back and arms, the inside back and arms and then the deck.
- If the fabric is in good condition (i.e. not ripped up or missing) use it to help measure your new fabric.
- Measure and cut your fabric to the right size, using the old fabric as a guide. On seamed edges cut ½” from the old seam. On stapled edges add 2-3” more, which will be used to pull the fabric cover onto the sofa.
- Sew your fabric using a ½” seam allowance.
- Using a staple gun, attach the new fabric to your sofa.
- Reattach the sofa deck, inside arms and back. Then add your cushions and reattach the outside arms and back.
You may also like
Your Bathroom Waste Legacy and Ways to Reduce It
Surprisingly Simple Ways to Refresh Your Worn-Out Furniture
The Importance of Choosing Sustainable Furnishings and How To Recognize It